


Table of Contents
ToggleA cluttered office kills productivity. Papers stack up, books lean precariously, and that “temporary” pile on the corner of the desk becomes permanent. The fix isn’t buying more desk space, it’s going vertical with well-planned shelving.
Office shelves do more than hold stuff. They define zones, keep daily-use items within arm’s reach, and turn blank walls into functional real estate. Whether someone’s working with 50 square feet or a dedicated room, the right shelving strategy makes the space work harder. This guide walks through proven shelf types, real installation considerations, and styling approaches that balance function with clean design.
Key Takeaways
- Office shelves ideas range from floating shelves for modern minimalist spaces to built-in units for maximum storage, each offering distinct advantages for productivity and design.
- Floating shelves require studs spaced 16 inches on center for safe mounting; for spans longer than 24 inches, secure into at least two studs to prevent failure.
- Built-in shelving adds resale value and solves awkward layouts, but involves multi-day projects requiring precision measuring, custom framing, and finishing work.
- Corner shelves maximize wasted space in small offices by transforming 90-degree dead zones into functional storage with floating, ladder-style, or built-in configurations.
- DIY office shelves using bracket systems, pipe shelving, or wooden crates offer budget-friendly alternatives that take a weekend to install and allow full customization.
- Balance shelf styling with the rule of thirds—fill two-thirds with functional items and leave one-third open—to maintain visual appeal while keeping supplies accessible.
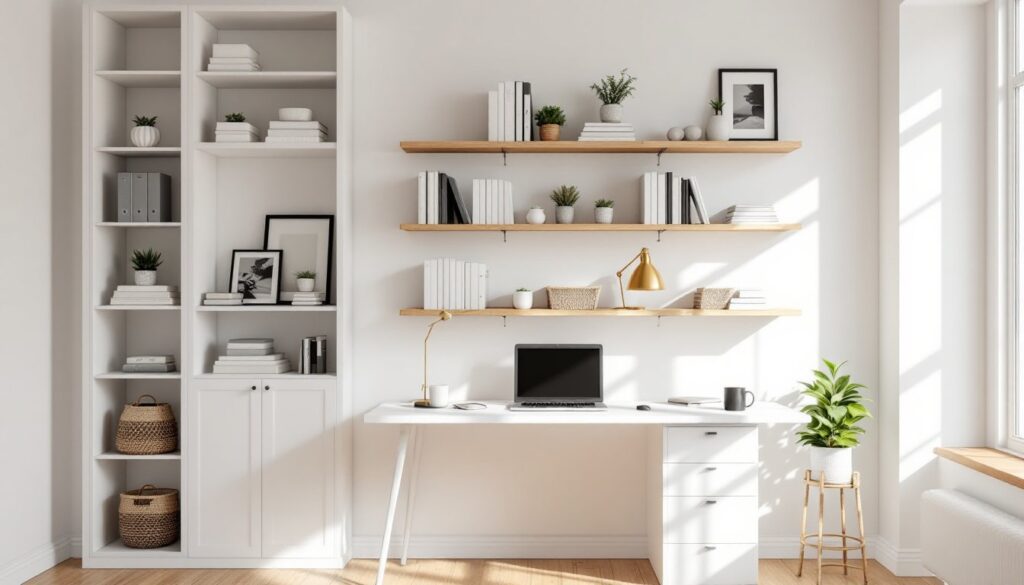
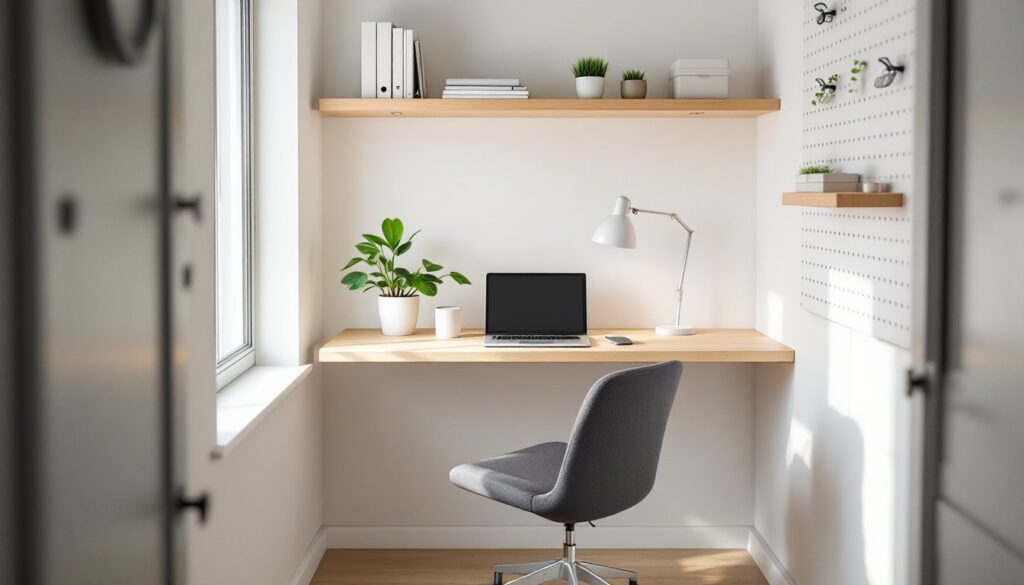
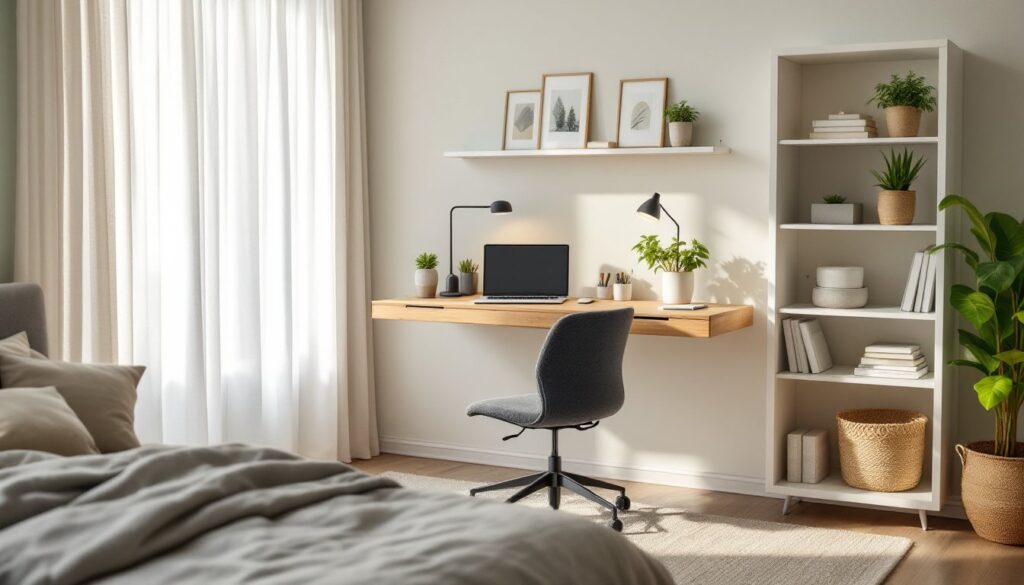
Floating Shelves for a Modern, Space-Saving Office
Floating shelves deliver clean lines and the illusion of more space. They’re mounted with concealed brackets or internal supports, so the hardware disappears into the wall. They work best in offices where floor space is tight or where someone wants an uncluttered aesthetic.
Most residential floating shelves are made from ¾-inch plywood, solid hardwood, or MDF. Solid wood like oak or walnut handles weight better and ages well. MDF keeps costs down but needs careful mounting, it doesn’t hold screws as reliably near edges.
Installation requires hitting studs. Standard wall studs are spaced 16 inches on center. Use a stud finder, mark locations, and plan shelf placement around that spacing. For shelves longer than 24 inches, mount into at least two studs. Typical floating shelf brackets are rated for 15–30 pounds per linear foot when properly installed into studs.
If studs don’t align where the shelf needs to go, toggle bolts or heavy-duty anchors rated for drywall can work for lighter loads (under 10 pounds per shelf). But don’t trust those for reference books or heavy storage bins.
Floating shelves shine above desks, flanking windows, or in narrow alcoves. Keep depth between 8–12 inches for books and office supplies. Deeper shelves (14+ inches) can look bulky and collect clutter unless styled intentionally.
Safety note: Always wear safety glasses when drilling overhead, and use a dust mask if cutting MDF (the dust is fine and irritating).
Built-In Shelving Units for Maximum Storage and Style
Built-ins are the premium option. They’re custom-fitted to the space, often floor-to-ceiling, and can incorporate drawers, cabinets, and adjustable shelving in one cohesive unit. They add resale value and make awkward corners or alcoves suddenly useful.
Framing a built-in typically involves constructing a face frame from 1×2 or 1×3 dimensional lumber (actual dimensions: ¾” x 1½” or ¾” x 2½”), then building the box carcass from ¾-inch plywood. Shelves themselves can be ¾-inch plywood with edge banding or solid wood. For spans over 36 inches, add a center support or use thicker material (1-inch plywood or doubled-up ¾-inch) to prevent sagging.
Adjustable shelf pins (also called spoon pins or shelf supports) allow flexibility. Drill holes every 2 inches along the vertical supports using a pegboard jig or a shop-made template to keep spacing consistent. Standard 5mm or ¼-inch pins work for most residential loads.
Built-in projects often involve custom cabinetry techniques that require patience and precision. Scribing the unit to fit uneven walls or floors is common, few rooms are perfectly square. A scribing tool or compass transfers the wall’s irregularities onto the unit for a tight fit.
This is a multi-day project. Budget time for measuring, cutting, assembly, finishing (paint or stain), and installation. If the built-in will house electrical outlets or task lighting, hire a licensed electrician to run wiring before closing up the structure. Electrical work inside built-ins often requires permits and NEC-compliant installation.
Finish options: Paint-grade MDF or poplar for a clean, modern look: hardwood plywood with stain for traditional offices. Always apply primer before paint, especially on MDF, to seal the surface and improve adhesion.
Corner Shelves to Maximize Every Inch of Your Office
Corners are wasted space in most offices. Corner shelves fix that by turning 90-degree dead zones into functional storage. They’re ideal for small offices, awkward layouts, or beside desks where L-shaped or wraparound configurations make sense.
Three common types: floating corner shelves, corner ladder shelves, and built-in corner units.
Floating corner shelves mount the same way as standard floating shelves but require careful layout. The shelf must bridge two walls, so both sides need secure mounting, ideally into studs on each wall. Use a laser level or a long straightedge to ensure the shelf sits level across both planes. Corner shelves typically have a 12-inch depth on each leg of the “L.”
Ladder-style corner shelves lean against the corner and don’t require wall mounting. They’re portable and renter-friendly but less stable under heavy loads. Look for units with a wide base (at least 18 inches) and anti-tip brackets if anchoring to the wall is an option.
Built-in corner units can incorporate the same principles as full built-ins but wrap the corner. Frameless (European-style) cabinets with adjustable hinges allow corner doors to open fully without interference. Inside corners, lazy Susan hardware or pull-out trays make deep storage accessible.
For DIYers inspired by free furniture plans, corner shelf projects are manageable weekend builds with basic tools. A miter saw helps for clean angle cuts where shelves meet the walls at 45 degrees.
Tip: Don’t overload corner shelves. Weight distribution on angled or cantilevered supports is less forgiving than on traditional brackets.
Open Shelving Systems for Flexible and Accessible Organization
Open shelving systems, like wall-mounted tracks with adjustable brackets, offer maximum flexibility. Shelves can be repositioned without new holes, and the system grows as storage needs change. These are modular, utilitarian, and fast to install.
Popular systems include slotted wall standards (aluminum or steel tracks with movable brackets). Standards mount vertically into studs, and brackets clip in at any height. Shelves rest on the brackets, no screws needed. Standard spacing between tracks is 16–32 inches, depending on shelf material and expected load.
Load capacity varies. Heavy-duty steel standards rated for industrial use can handle 100+ pounds per bracket pair when mounted into solid framing. Lighter aluminum versions or those mounted with anchors may max out at 20–30 pounds per shelf. Always check manufacturer specs.
Shelves for open systems can be cut from ¾-inch plywood, pine boards, or even butcher block for a warm, industrial look. Standard shelf depths are 10, 12, or 14 inches. For office use, 12 inches is the sweet spot, deep enough for binders and storage boxes, not so deep that items get lost.
If the office includes a mix of open and enclosed storage solutions, adjustable systems let someone dial in the ratio over time.
These systems excel in garage workshops, utility offices, or spaces where aesthetics take a backseat to access and reorganization. They’re less formal than built-ins but far more adaptable.
Installation note: Use a 48-inch level when mounting vertical standards. Even small deviations compound over height, and shelves won’t sit flush.
DIY Office Shelves: Budget-Friendly Ideas You Can Build Yourself
Building office shelves from scratch saves money and allows full customization. With basic tools and dimensional lumber, most DIYers can knock out functional shelving in a weekend.
Simple bracket shelf: The easiest DIY. Buy L-brackets (8–12 inches deep, depending on shelf depth) and a board. Mount brackets into studs, set the board on top, and secure with screws from underneath. Use 1×10 or 1×12 pine boards (actual width: ¾” x 9¼” or 11¼”) for a rustic look, or edge-banded plywood for a cleaner finish.
Pipe shelving: Industrial-style shelves using ¾-inch black iron pipe and floor flanges. Cut pipe to length (most hardware stores will thread custom lengths), screw flanges into studs, and rest stained or sealed wood planks on the pipes. This style works well in modern or minimalist offices and handles serious weight, iron pipe doesn’t flex like wood.
Crate or box shelves: Stack and mount wooden crates for modular, cubby-style storage. Secure them to each other with wood screws and anchor the stack to the wall with L-brackets at the top. Crates from craft stores run $10–$20 each: reclaimed versions add character.
For woodworkers comfortable with project plans, building a bookcase with a table saw, dado blades, and pocket screws produces cleaner results than off-the-shelf units. Dados (grooves cut into the vertical supports) give shelves a mechanical lock and prevent sagging.
Finishing matters. Sand everything with 120-grit sandpaper, then 220-grit before finishing. Stain shows wood grain but requires a topcoat (polyurethane or wipe-on poly) for durability. Paint hides imperfections but needs primer first, especially on pine (which can bleed tannins).
Tools needed: Drill/driver, level, stud finder, saw (circular or miter), tape measure, and a speed square for marking cuts. Safety gear: Eye protection, hearing protection if using power saws, and a dust mask when sanding.
Styling Your Office Shelves for Function and Visual Appeal
Empty shelves look bare. Overloaded shelves look chaotic. The balance is intentional styling that keeps frequently used items accessible while adding visual interest.
Group by function first. Reference books together, office supplies in bins, decor as accents. Use the rule of thirds: fill roughly two-thirds of the shelf with functional items, leave one-third open or lightly styled. This keeps shelves from feeling cluttered.
Vertical and horizontal variation adds rhythm. Stack a few books flat, stand others upright, add a small plant or framed photo. Avoid lining everything up like a library, it reads as sterile.
Storage bins and baskets hide clutter and create clean blocks of color or texture. Label bins if the contents aren’t obvious. Wire baskets work in industrial or farmhouse-style offices: fabric bins soften modern or minimalist spaces.
If decorating the broader workspace, shelves should echo the room’s material palette, wood tones, metal accents, or painted finishes that tie into the desk and seating.
Color blocking can work: group items by color (all white objects, then wood tones, then black accents) for a curated look. But don’t force it, this works best with decor-forward offices, not working spaces packed with mismatched binders.
Lighting adds polish. Battery-powered LED puck lights or adhesive strip lighting under shelves illuminate the workspace and highlight styled sections. Low-voltage LED tape is safe and doesn’t generate heat, but hardwired options exist for built-ins.
A common mistake: over-styling. If someone’s reaching for supplies daily, functional shelving beats Instagram-ready arrangements. Prioritize access, then refine the look.
Conclusion
Office shelves aren’t one-size-fits-all. Floating shelves suit minimalists and small spaces. Built-ins deliver heirloom-quality storage but require commitment. Corners and adjustable systems squeeze function from every angle and adapt over time. DIY builds keep budgets in check and allow full creative control.
The right shelving setup turns a cramped or chaotic office into a workspace that actually works, papers filed, tools within reach, and enough breathing room to think clearly. Pick the approach that matches the space, the skill level, and how the office gets used day to day.