


Table of Contents
ToggleRemote work isn’t going anywhere, and that spare corner in the hallway or underutilized closet is begging for a purpose. An office nook doesn’t require a dedicated room, just a few square feet, some smart furniture choices, and a clear plan. Whether you’re carving out space in a bedroom, hallway, or under the stairs, this guide walks through practical layouts, storage hacks, and DIY projects that turn wasted space into a functional workspace. No fluff, no Pinterest fantasies, just actionable strategies to build a nook that actually works.
Key Takeaways
- Office nook ideas solve the remote work challenge by transforming unused corners, closets, or hallways into dedicated workspace zones without requiring a full separate room.
- Location is more important than size—prioritize areas with natural light, minimal traffic, and electrical access within 6 feet to maximize productivity and safety.
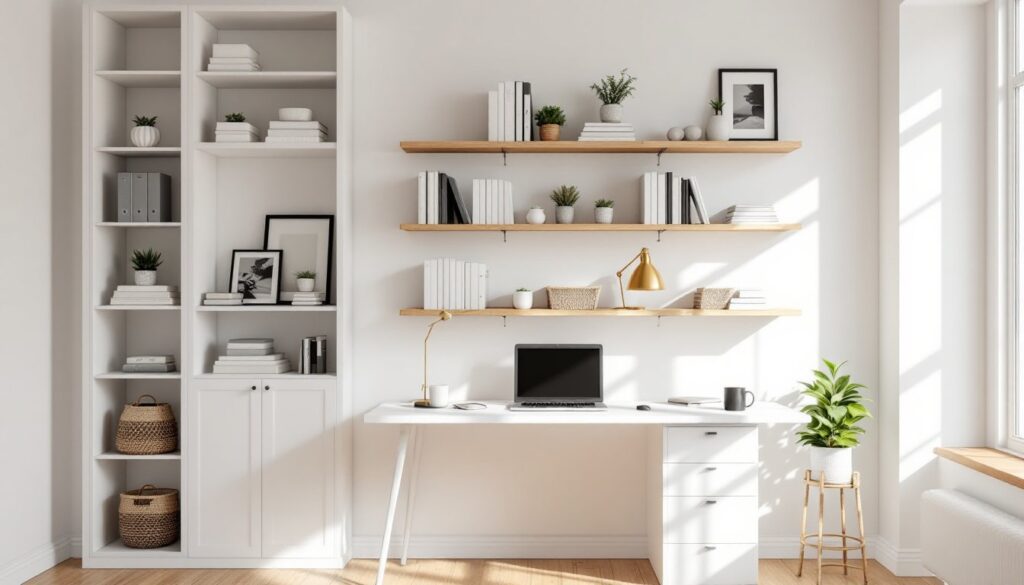
- Floating desks and wall-mounted solutions maximize small spaces by eliminating floor legs and freeing legroom, making narrow nooks feel less cramped.
- Vertical storage through open shelving, pegboards, and compact filing units keeps desktops clutter-free and improves focus in confined areas.
- Layer multiple light sources (task lights, ambient lighting, and natural light) to prevent eye strain and transform dim nooks into functional workspaces.
- DIY office nook projects using basic tools and budget-friendly materials (plywood, 2x4s, brackets) can be completed for $50–$150, turning wasted space into a custom home office.
What Is an Office Nook and Why Every Home Needs One
An office nook is a compact, dedicated workspace carved from an existing area, typically 24 to 48 inches deep and 36 to 60 inches wide. Unlike a full home office, it doesn’t demand a separate room. Instead, it repurposes corners, closets, alcoves, or even wide hallways into functional work zones.
The case for having one is straightforward: remote and hybrid work models are the norm now, and kitchen tables don’t cut it for long-term productivity. A nook establishes boundaries, reduces clutter in shared spaces, and signals to others (and yourself) that work happens here. Studies on workspace psychology show that dedicated work zones improve focus and reduce the mental fatigue that comes from constantly setting up and breaking down a laptop on the dining table.
From a practical standpoint, nooks solve real estate problems. Not everyone has a spare bedroom, but most homes have 4 to 6 feet of underused space somewhere. Hallways, closets with the doors removed, the dead zone beside a staircase, or even a wide landing can host a nook. The goal is to claim a slice of square footage and make it work harder.
Finding the Perfect Spot for Your Office Nook
Location matters more than size. A poorly placed nook becomes a source of frustration, while a well-chosen spot turns into a productivity hub. Start by walking through the home and identifying spaces that meet three criteria: adequate natural or artificial light, minimal foot traffic, and access to electrical outlets.
Top candidate spots:
- Closets: Remove bifold or sliding doors, install a desk at standard height (28 to 30 inches), and you’ve got an instant nook with built-in walls for shelving.
- Wide hallways: If a hallway is 5 feet or wider, a shallow desk (18 to 24 inches deep) along one wall won’t obstruct traffic.
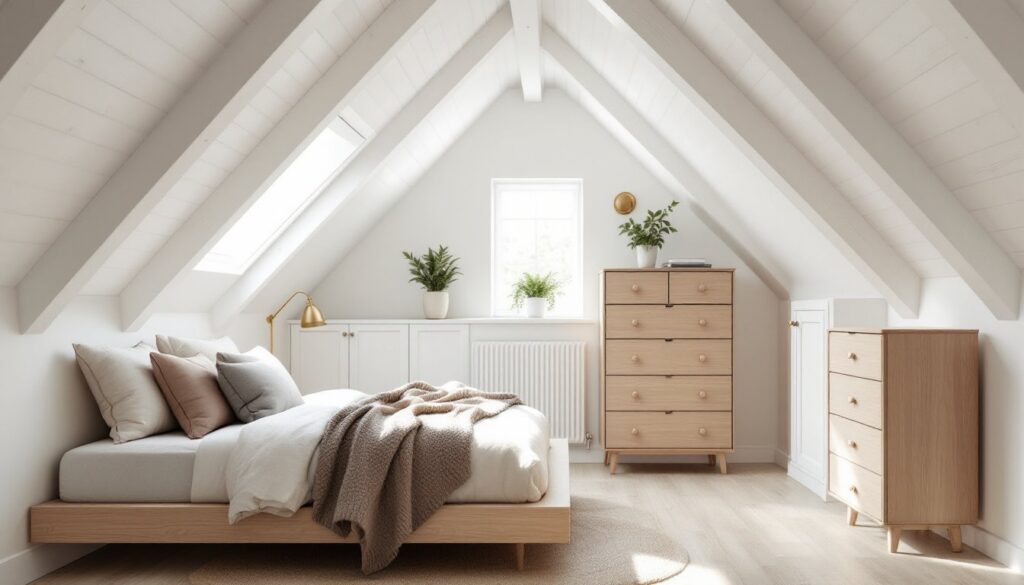
- Under stairs: Sloped ceilings limit standing height, but sitting height (around 36 to 40 inches of clearance) is all you need for a desk.
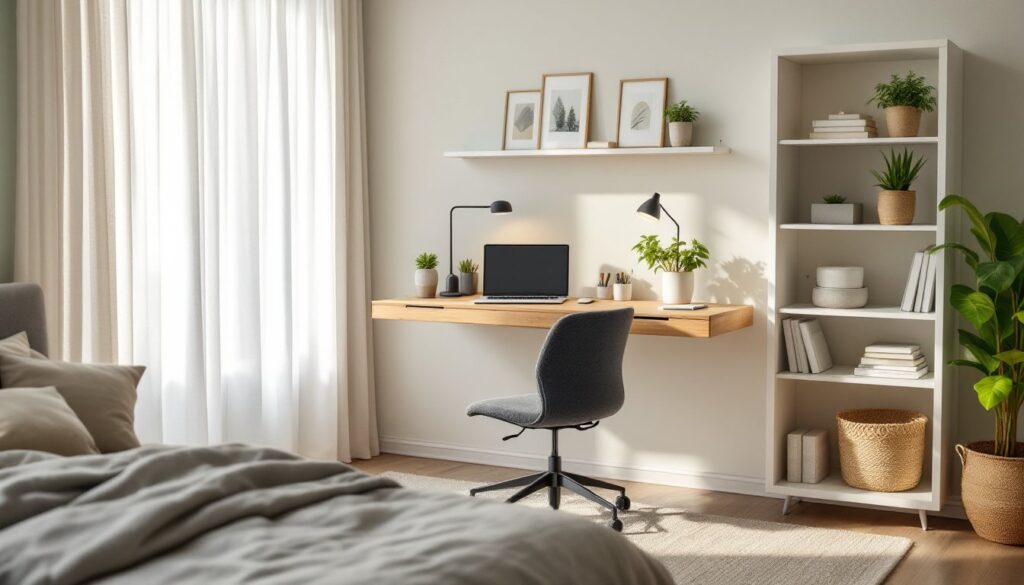
- Bedroom corners: Position the desk perpendicular to the wall to create separation from the sleeping area. A room divider or bookshelf can reinforce the boundary.
- Living room alcoves: If there’s a niche beside a fireplace or bay window, it’s often deep enough for a narrow desk.
Electrical considerations: Most nooks need at least one 15-amp circuit for a computer, monitor, and task light. If the nearest outlet is more than 6 feet away, plan to add one, it’s a straightforward job for a licensed electrician and typically costs $150 to $300. Running extension cords across walkways is a trip hazard and a code violation in many jurisdictions.
Noise and privacy: Nooks near kitchens or family rooms will be noisier. If that’s unavoidable, budget for a white noise machine or noise-canceling headphones. For video calls, a neutral backdrop (blank wall or simple shelving) looks more professional than a view into a bedroom.
Essential Furniture and Layout Ideas for Small Office Nooks
Furniture selection in a nook is a study in compromise. Standard desks (60 inches wide, 30 inches deep) won’t fit in most nooks, so the focus shifts to small desks and custom-sized solutions. The desk is the anchor, get that right, and everything else falls into place.
Desk sizing: Measure the nook’s width and depth, then subtract 6 inches from each dimension to allow for chair clearance and elbow room. A desk that’s 42 inches wide and 20 inches deep is tight but workable for a laptop and notepad. If the nook is 48 inches wide or more, consider an L-shaped layout to maximize surface area without eating into the room.
Chair options: A standard office chair with a 26-inch base fits most nooks, but armless models save 4 to 6 inches of width. Stools work in pinch if the desk height allows, but ergonomics suffer after an hour. Look for chairs that tuck completely under the desk when not in use, it keeps the nook from feeling like an obstacle.
Material considerations: Solid wood desks are durable but heavy: if you’re building into a closet or hallway, consider plywood or MDF with a hardwood veneer. Both materials are stable, take paint or stain well, and cost 30 to 50 percent less than solid hardwood. Avoid particleboard in nooks with humidity issues (near bathrooms or exterior walls), it swells and delaminates over time.
Floating Desks and Wall-Mounted Solutions
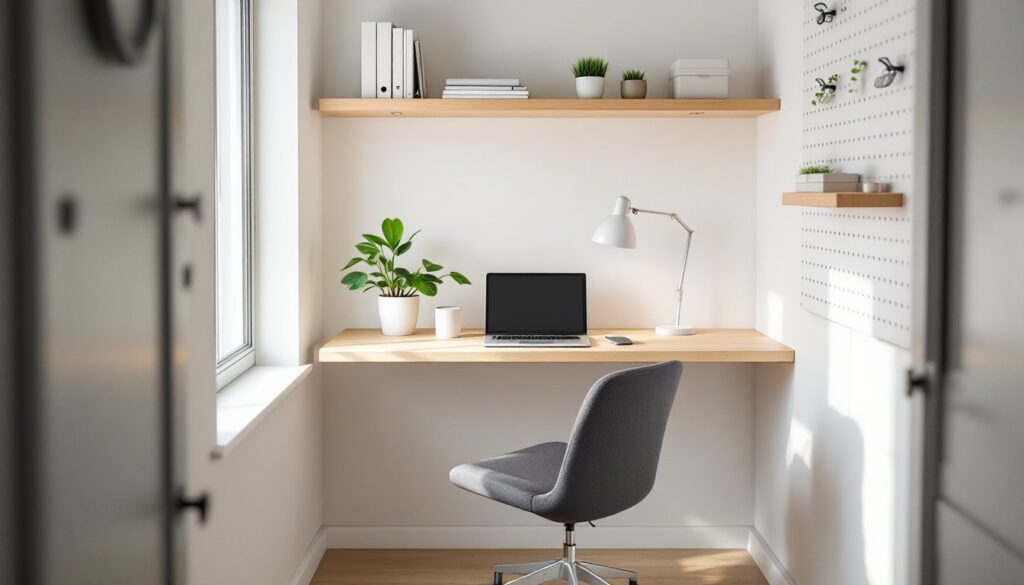
When floor space is nonexistent, go vertical. Floating desks attach directly to wall studs and eliminate the need for legs, freeing up legroom and making the nook feel less cramped. They’re ideal for narrow hallways or closets where a traditional desk would block passage.
Installation basics: Locate studs with a stud finder (they’re typically spaced 16 inches on center in most homes). A floating desk supporting a computer, monitor, and books needs to anchor into at least two studs. Use 3-inch construction screws or lag bolts rated for 50 pounds per stud. If studs don’t align with your desired desk position, install a cleat, a horizontal 1×4 or 2×4 screwed into multiple studs that the desk top mounts to.
For a basic floating desk, a 3/4-inch plywood top cut to size works well. Seal the edges with iron-on veneer tape or paint, then mount it on heavy-duty brackets (rated for 100+ pounds) or a cleat. Desk depth should be 16 to 24 inches: anything shallower feels cramped, anything deeper intrudes into the space.
Alternatives: Wall-mounted fold-down desks (also called Murphy desks) hinge up when not in use, reclaiming floor space entirely. They’re great for nooks that double as hallways or guest spaces. Most fold-down mechanisms are rated for 30 to 50 pounds, so plan accordingly if you have heavy equipment.
Creative Storage Solutions to Maximize Your Nook Space
Nooks have no room for clutter. Every item needs a home, and vertical storage is the key to keeping the desktop clear. The goal is to maximize storage density without making the nook feel like a closet.
Shelving strategies: Open shelving above the desk is the simplest option. Install home office shelves 12 to 18 inches above the desk surface, high enough to avoid head bumps, low enough to reach without standing. Use 1×10 or 1×12 boards for shelves (actual dimensions: 9.25 inches or 11.25 inches wide). Support them with brackets every 24 to 32 inches to prevent sagging.
For a cleaner look, build a floating shelf system using concealed brackets or French cleats. French cleats are simple: rip a board at a 45-degree angle, screw one half to the wall studs and the other to the shelf back. The interlocking bevels hold the shelf securely and allow for easy removal.
Drawer and cabinet units: If the nook has floor space, a small filing cabinet or drawer unit (15 to 18 inches wide) tucks under the desk. Rolling models on casters add flexibility. For built-in nooks (like closet conversions), consider installing drawers directly into the desk structure. Basic drawer slides rated for 75 to 100 pounds cost $10 to $30 per pair and are straightforward to install.
Pegboard and grid systems: A pegboard panel (1/4-inch tempered hardboard with evenly spaced holes) mounted behind or beside the desk provides modular storage. Hooks, baskets, and shelves rearrange without tools. Paint it to match the wall or leave it natural for an industrial vibe. Mount pegboard with 1-inch spacers behind it so hooks can slide in.
Cable management: Nooks accumulate cables fast. Use adhesive cable clips to route cords along the desk underside or wall edge. A power strip with a mounting bracket keeps outlets accessible without cluttering the desktop. For a cleaner install, drill a 1.5-inch grommet hole through the desk top for cables to pass through, it hides the mess and looks intentional.
Lighting and Decor Tips to Make Your Office Nook Inspiring
Poor lighting kills productivity. Nooks, especially those in closets or interior corners, often lack natural light. Layer multiple light sources to reduce eye strain and create a workspace that doesn’t feel like a cave.
Task lighting: A desk lamp with an adjustable arm directs light exactly where it’s needed. LED bulbs in the 3000K to 4000K range (warm white to neutral white) provide enough brightness without the harsh blue tint of daylight bulbs. Look for lamps with at least 400 to 600 lumens for reading and screen work.
Ambient lighting: If the nook is in a dim area, supplement with an overhead fixture or wall sconce. Battery-operated LED puck lights stick to the underside of shelves and add localized brightness without wiring. For closet nooks, a simple flush-mount LED fixture wired into the existing circuit (if there’s a switch nearby) is a clean solution.
Natural light: If the nook is near a window, position the desk perpendicular to it, not facing it. Direct sunlight creates screen glare and uneven lighting. A sheer curtain or adjustable blind diffuses light without blocking it entirely.
Color and finishes: Light-colored walls (whites, soft grays, pale blues) reflect light and make small spaces feel larger. If the nook walls are dark or wood-paneled, a coat of semi-gloss or satin paint brightens things up and is easy to clean. Bold accent colors work on a single wall or shelf backing but can feel overwhelming in a confined space, test a sample first.
Decor with purpose: Nooks don’t need much decoration, but a few items personalize the space without adding clutter. A small plant (pothos, snake plant, or a succulent) improves air quality and softens hard edges. A corkboard or magnetic board keeps notes visible without covering the desk. Avoid heavy frames or shelves packed with knickknacks, they collect dust and make the nook feel busy.
For those aiming for a minimalist home office aesthetic, stick to function-first pieces and limit decor to one or two meaningful items. The simpler the nook, the easier it is to keep clean and focused.
Budget-Friendly DIY Office Nook Projects You Can Start Today
Building a nook from scratch doesn’t require a full workshop or a four-figure budget. Most projects use basic tools (drill, circular saw or miter saw, level, tape measure) and materials available at any home center. Here are three approachable builds.
Project 1: Closet Conversion Nook
- Remove closet doors (save the hardware if you might reinstall them later).
- Patch any screw holes in the door frame with wood filler, sand smooth, and paint.
- Cut a 3/4-inch plywood desk top to fit the closet width, typically 48 to 72 inches wide and 20 to 24 inches deep.
- Support the desk with a 2×2 cleat screwed into the studs on three sides (back and sides), or use adjustable shelving brackets for flexibility.
- Add a strip of iron-on edge banding to exposed plywood edges for a finished look.
- Install a power strip inside the closet and run cables through a desk grommet.
- Add shelving above using the existing closet rod mounting holes or new brackets.
Estimated cost: $60 to $120 (plywood, cleats, brackets, edge banding, screws)
Project 2: Floating L-Shaped Corner Desk
- Locate wall studs in both walls of the corner.
- Cut two pieces of 3/4-inch plywood: one 48 inches long, one 36 inches long, both 18 inches deep (adjust to fit your corner).
- Miter the joining ends at 45 degrees so they meet cleanly in the corner, or butt them together and cover the seam with a corner bracket.
- Install a 2×4 cleat on each wall at 29 inches above the floor (standard desk height minus the plywood thickness).
- Screw the plywood tops to the cleats using 2.5-inch screws every 16 inches.
- Finish edges with veneer tape or paint. For a polished look, round over the front edge with a router and 1/4-inch roundover bit.
Estimated cost: $50 to $100 (plywood, 2x4s, screws, finish)
Project 3: Under-Stairs Nook with Built-In Storage
- Measure the clearance under the stairs, you need at least 40 inches of headroom at the desk front.
- Frame a simple desk structure using 2x4s: vertical legs at the front, horizontal supports across the back attached to the stair stringer or wall studs.
- Top the frame with a 3/4-inch plywood or solid wood surface.
- Build a home office bookcase or open shelving into the space beside or above the desk, using the stair slope as a design feature.
- If the underside of the stairs is exposed, add a bead board or plywood panel to the ceiling for a cleaner look. Secure it with finishing nails or adhesive.
- Paint or stain all components before final assembly to avoid tight brush work.
Estimated cost: $80 to $150 (2x4s, plywood, screws, paint or stain)
Safety notes for all projects: Wear safety glasses when cutting or drilling. Use a dust mask when sanding MDF or treated lumber. If you’re unsure about electrical work (adding outlets or hardwiring lights), hire a licensed electrician, DIY electrical errors can cause fires or code violations.
For more polished storage, integrating built-in office cabinets provides a seamless look, though they require more precise carpentry and potentially a cabinet-grade plywood upgrade.
Finishing touches: Once the structure is in place, consider ideas from design resources like Apartment Therapy for small-space styling, or explore modern layouts on Decoist for inspiration that translates well to compact nooks. For color schemes and decor that tie the nook into the rest of the home, MyDomaine offers room-by-room guides that work in tight quarters.
Whether you’re converting a closet, claiming a corner, or building under the stairs, a well-executed nook proves that you don’t need an entire room to create a productive workspace. Measure twice, cut once, and don’t skip the prep work, most DIY disasters stem from rushing through layout and assembly. With the right approach, even a few square feet can become a custom home office tailored to how you actually work.