

Table of Contents
ToggleThe shower pan is one of the hardest-working surfaces in your bathroom, enduring daily water exposure and foot traffic. But function doesn’t mean boring. The right tile can turn a basic shower floor into a design statement while maintaining the slip resistance and drainage performance you need. Whether you’re tackling a full bathroom remodel or upgrading a builder-grade shower, the tile you choose for your shower pan sets the tone for the entire space. From classic mosaics to modern large-format slabs, the options are wider than ever, and each comes with its own installation quirks and performance considerations.
Key Takeaways
- Shower pan tile choice impacts slip resistance, maintenance, and water management—smaller tiles improve traction with more grout lines, while larger tiles require textured finishes to prevent slipping.
- Mosaic and pebble tiles are the easiest shower pan tile options for DIY installation, conforming naturally to required slopes and providing excellent grip even when wet.
- Large-format tiles (12×12 inches and larger) create a modern, minimalist look but demand professional installation expertise to maintain proper slope and prevent standing water or structural damage.
- Natural stone shower pan tiles like marble, slate, and granite require annual sealing and ongoing maintenance to resist staining and etching, making them more labor-intensive than porcelain alternatives.
- DCOF slip-resistance ratings of 0.42 or higher are essential for wet bathroom areas per ADA standards, achieved through smaller tile formats, textured finishes, or matte glazes.
- Proper waterproofing, slope verification, and quality epoxy grout are critical fundamentals for long-term shower pan performance, often worth the investment in professional installation to avoid costly subfloor damage.
What Is a Shower Pan and Why Does Tile Choice Matter?
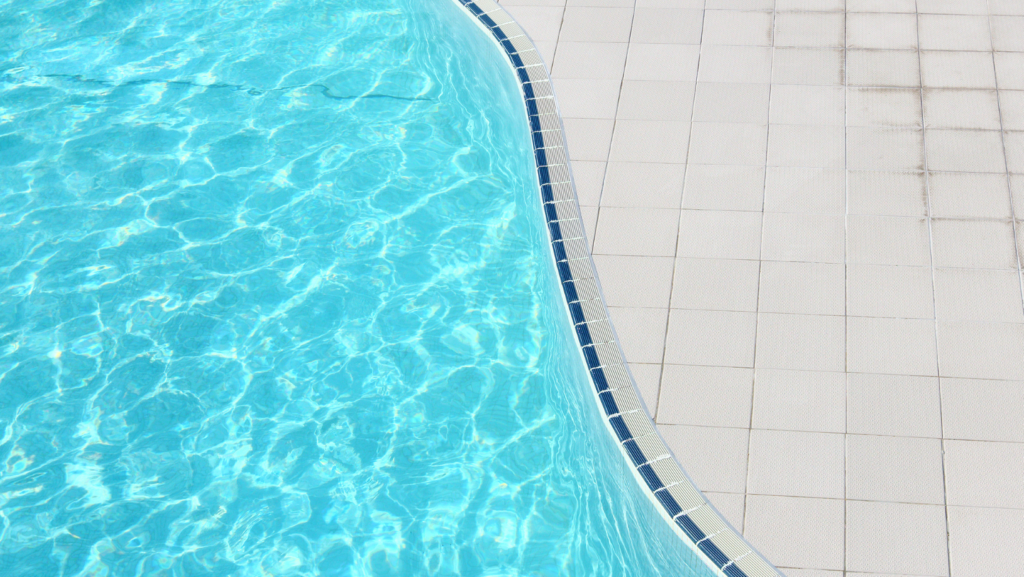
A shower pan (also called a shower base or shower floor) is the sloped, waterproof foundation beneath your shower floor tile. It channels water toward the drain and prevents leaks into the subfloor. Most DIY tile jobs involve installing tile over a mortar bed that’s been formed over a waterproof membrane (like a PVC or CPE liner) or a pre-sloped foam pan system.
Tile choice matters for three reasons: slip resistance, maintenance, and water management. Smaller tiles create more grout lines, which improve traction when wet but require more cleaning. Larger tiles offer a sleek look but can be slippery without a textured finish. Porosity is another factor, natural stone needs sealing, while porcelain is virtually waterproof.
Your tile also affects installation complexity. Mosaic sheets conform easily to the required 1/4-inch per foot slope toward the drain. Large-format tiles require precision cutting and skilled layout to maintain that slope without lippage (uneven edges between tiles). If you’re new to tile work, stick with smaller formats or hire a pro for anything over 6×6 inches on a sloped surface.
Classic Mosaic Tile Shower Pan Designs
Mosaic tile, typically 1-inch to 2-inch squares or hexagons, remains the gold standard for shower pans. The small format follows curves and slopes easily, and the abundance of grout lines provides excellent slip resistance even when soapy.
Hexagon (hex) tile in matte white or black is seeing a resurgence in 2026, especially in 2-inch formats. The geometric pattern adds visual interest without overwhelming a small shower footprint. Pair it with simple subway tile on the walls to keep the look balanced.
Penny round tile (3/4-inch to 1-inch circles) offers a softer, more organic feel. These are often sold on mesh-backed sheets for easier installation. The grout lines radiate in all directions, making any slope less noticeable and providing grip from every angle. Penny tile designs work especially well in vintage-inspired or coastal bathroom styles.
Square mosaic sheets (1×1-inch or 2×2-inch) are the easiest for beginners. They’re uniform, cut cleanly with a wet saw, and the grid pattern helps you keep lines straight. Choose a slip-resistant glaze or an unglazed porcelain for safety.
One trade-off: more grout means more maintenance. Use a high-quality epoxy grout or a grout with a built-in sealer to resist mold and staining. Expect to scrub grout lines monthly in a high-use shower.
Modern Large-Format Tile Options for Shower Pans
Large-format tile (anything 12×12 inches or bigger) creates a clean, minimalist look with fewer grout lines. But installing it on a sloped shower pan requires experience. The tiles must be back-buttered (thinset applied to both the substrate and the back of the tile) to prevent voids, and the slope must be perfect to avoid standing water.
12×24-inch porcelain planks in wood-look or concrete finishes are popular for contemporary bathrooms. Lay them in a brick pattern or straight-set, depending on the drain location. Make sure to specify a textured or matte finish, polished large-format tile is a slip hazard when wet.
Rectified porcelain tile (tiles with precisely cut, sharp edges) allows for tight 1/16-inch grout lines, giving an almost seamless appearance. This is ideal if you want the shower pan to visually blend with the wall tile in a monochromatic design.
For slip resistance, look for tiles rated DCOF 0.42 or higher (Dynamic Coefficient of Friction). This is the standard for wet areas per the Americans with Disabilities Act (ADA). Many modern porcelain tiles now include a subtle texture that doesn’t compromise the clean aesthetic.
One caution: large-format tiles are heavy and require a solid mortar bed or foam pan system that won’t flex. If your subfloor has any give, you’ll crack tiles or lose the waterproof seal. This is usually a job for a tile pro unless you’re confident in your mud work.
Natural Stone Shower Pan Tile Ideas
Natural stone brings warmth and texture, but it demands more upkeep than porcelain. Marble, slate, travertine, and granite are common choices, each with distinct characteristics.
Honed marble (non-polished) in 2×2-inch or 3×3-inch tiles offers a spa-like feel. White Carrara or Calacatta marble pairs beautifully with chrome or brushed nickel fixtures. But, marble is porous and requires sealing every 6–12 months to prevent staining and etching from soap and shampoo.
Slate tile provides natural slip resistance thanks to its cleft (textured) surface. It’s available in earthy tones, grays, greens, rusts, that hide soap scum and water spots better than white tile. Slate is denser than marble and holds up well to daily use, but the surface texture can be rough underfoot.
Travertine has a tumbled, rustic look with natural pits and voids. It’s often filled and honed for shower use, but it still requires sealing. The neutral tan and beige tones work well in Mediterranean or transitional bathroom designs.
Granite tile is one of the most durable natural stones, nearly as hard as porcelain. It’s available in polished or flamed (textured) finishes. For a shower pan, always choose flamed or honed granite to avoid slipping.
All natural stone should be sealed with a penetrating sealer before grouting and resealed annually. For installation help and maintenance tips, resources like Bob Vila offer guidance on working with stone tile in wet areas.
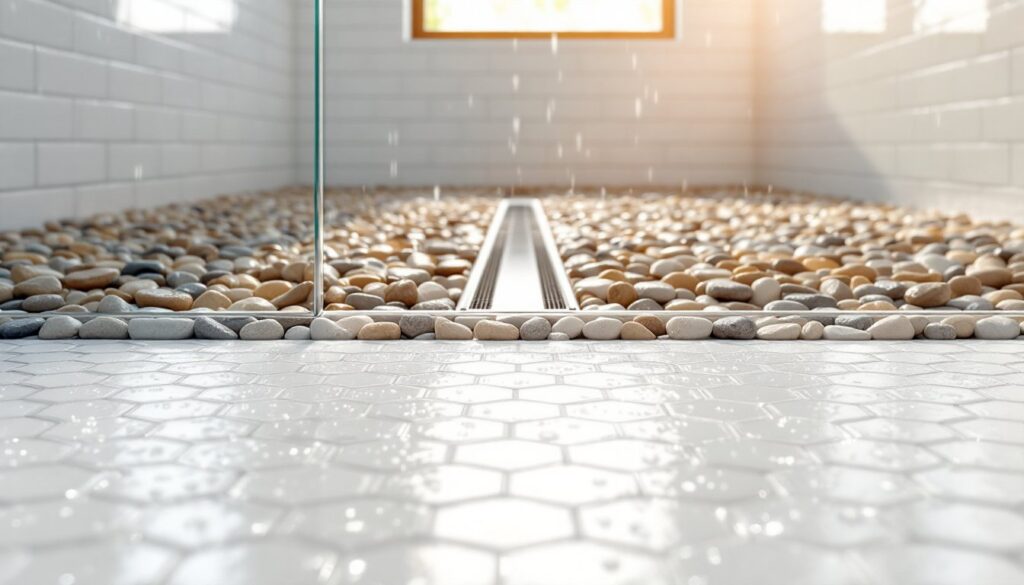
Pebble and River Rock Shower Pan Styles
Pebble tile, real or porcelain stones bonded to a mesh backing, delivers a natural, spa-inspired aesthetic and unbeatable slip resistance. The irregular surface massages feet and provides grip in every direction, making it one of the safest shower pan options.
Natural river rock pebbles come in shades of gray, tan, black, and white. They’re sold in 12×12-inch mesh sheets and install much like mosaic tile, though the uneven surface requires extra thinset and patience. You’ll need to press each stone into the mortar bed to ensure full contact, voids will lead to loose stones over time.
Porcelain pebble tile mimics the look of natural stone but offers uniform sizing and easier cleaning. The grout lines between porcelain pebbles are easier to scrub than the nooks between real rocks.
Pebbles work especially well in curbless (zero-entry) showers where the floor transitions seamlessly into the bathroom floor. The texture change provides a tactile boundary and prevents slipping on the slope.
One downside: pebble tile is harder on bare feet than smooth tile. Some homeowners love the massage effect: others find it uncomfortable. Consider ordering a sample sheet to test underfoot before committing to a full shower pan.
Grouting pebbles takes longer than flat tile. Use a non-sanded grout for gaps under 1/8 inch, and pack it carefully between stones with a grout float and sponge. Plan for extra cleanup time, grout haze clings to the irregular surface.
Key Considerations When Choosing Shower Pan Tile
Before you buy tile, walk through these five checkpoints.
1. Slip Resistance
Look for a DCOF rating of 0.42 or higher for wet areas. Smaller tiles, textured finishes, and matte glazes all improve traction. Polished marble and glossy porcelain are beautiful on walls, not shower floors.
2. Slope and Drainage
Your shower pan must slope at least 1/4 inch per foot toward the drain. Smaller tiles (mosaics, pebbles) conform to slopes more easily than large-format tiles. If your pan is pre-sloped foam or mortar, verify the slope with a level before tiling.
3. Tile Thickness and Weight
Natural stone and thick porcelain add significant weight. Make sure your floor joists and subfloor can support it, most residential floors are built to handle it, but if you’re working on a second-story bathroom or older home, check the framing. When in doubt, consult a structural engineer.
4. Grout Type and Maintenance
Use epoxy grout for the most stain- and mold-resistant finish, especially with white or light-colored grout. Standard cement grout works but needs sealing. Darker grout hides staining better than white, though white grout is trending again in 2026 for its clean, spa-like look.
5. DIY vs. Professional Installation
Mosaic tile on a pre-sloped foam pan is a manageable DIY project for someone with basic tile experience. Mud-bed installation, large-format tile, or natural stone typically require a licensed tile setter. A failed waterproof membrane or improper slope can lead to leaks and subfloor rot, expensive fixes that far exceed the cost of hiring a pro upfront. Many regions require a plumbing permit for shower pan work: check with your local building department. For project guidance and troubleshooting, sites like Family Handyman offer step-by-step walkthroughs and video tutorials.
Conclusion
Choosing the right shower pan tile comes down to balancing aesthetics, safety, and your skill level. Mosaic and pebble tiles offer proven slip resistance and easier installation, while large-format and natural stone tiles deliver a modern, high-end look that demands precision. Whichever route you take, prioritize proper waterproofing, slope, and grout quality, those fundamentals will determine whether your shower floor performs well for decades or becomes a maintenance headache. Measure twice, dry-fit your layout, and don’t skip the sealer.